
How to Create a Pipeline
1. Accessing the Pipelines menu
Section titled “1. Accessing the Pipelines menu”Go to https://app.mappingclarity.com/pipelines or select Pipelines from the main navigation menu.
The page shows any existing pipelines you have created.

The Pipelines page lists saved pipelines and starts the creation flow.
2. Starting the creation process
Section titled “2. Starting the creation process”Select Create Pipeline to open the pipeline creation form.
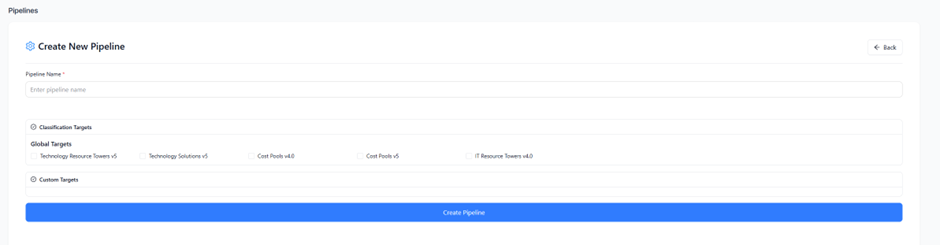
Name the pipeline and select the targets each upload should map against.
3. Defining the pipeline
Section titled “3. Defining the pipeline”- Give the pipeline a unique, descriptive name. This name appears when you select a pipeline for a new upload.
- Select the targets you want to include in this pipeline. If you have not created any custom targets, only global targets are available.
- Click Create Pipeline.
4. Using and managing the pipeline
Section titled “4. Using and managing the pipeline”Your new pipeline appears in the pipeline list and is available for selection in the New Upload tab.
Admin users can remove a pipeline from the Pipelines screen by selecting Delete next to the pipeline name.